Deep guide
How to get better results with this workflow
When one YouTube video needs to become notes, quotes, captions, translations, and an article outline, divide the work by task rather than copying text between unrelated tools.
Start on desktop to import the video and create the first transcript. Use a tablet when a larger touch screen helps with review. Finish on phone when you need quick quote corrections or an export away from your desk.
Step 1: Capture the YouTube Video and Generate the Transcript on Desktop
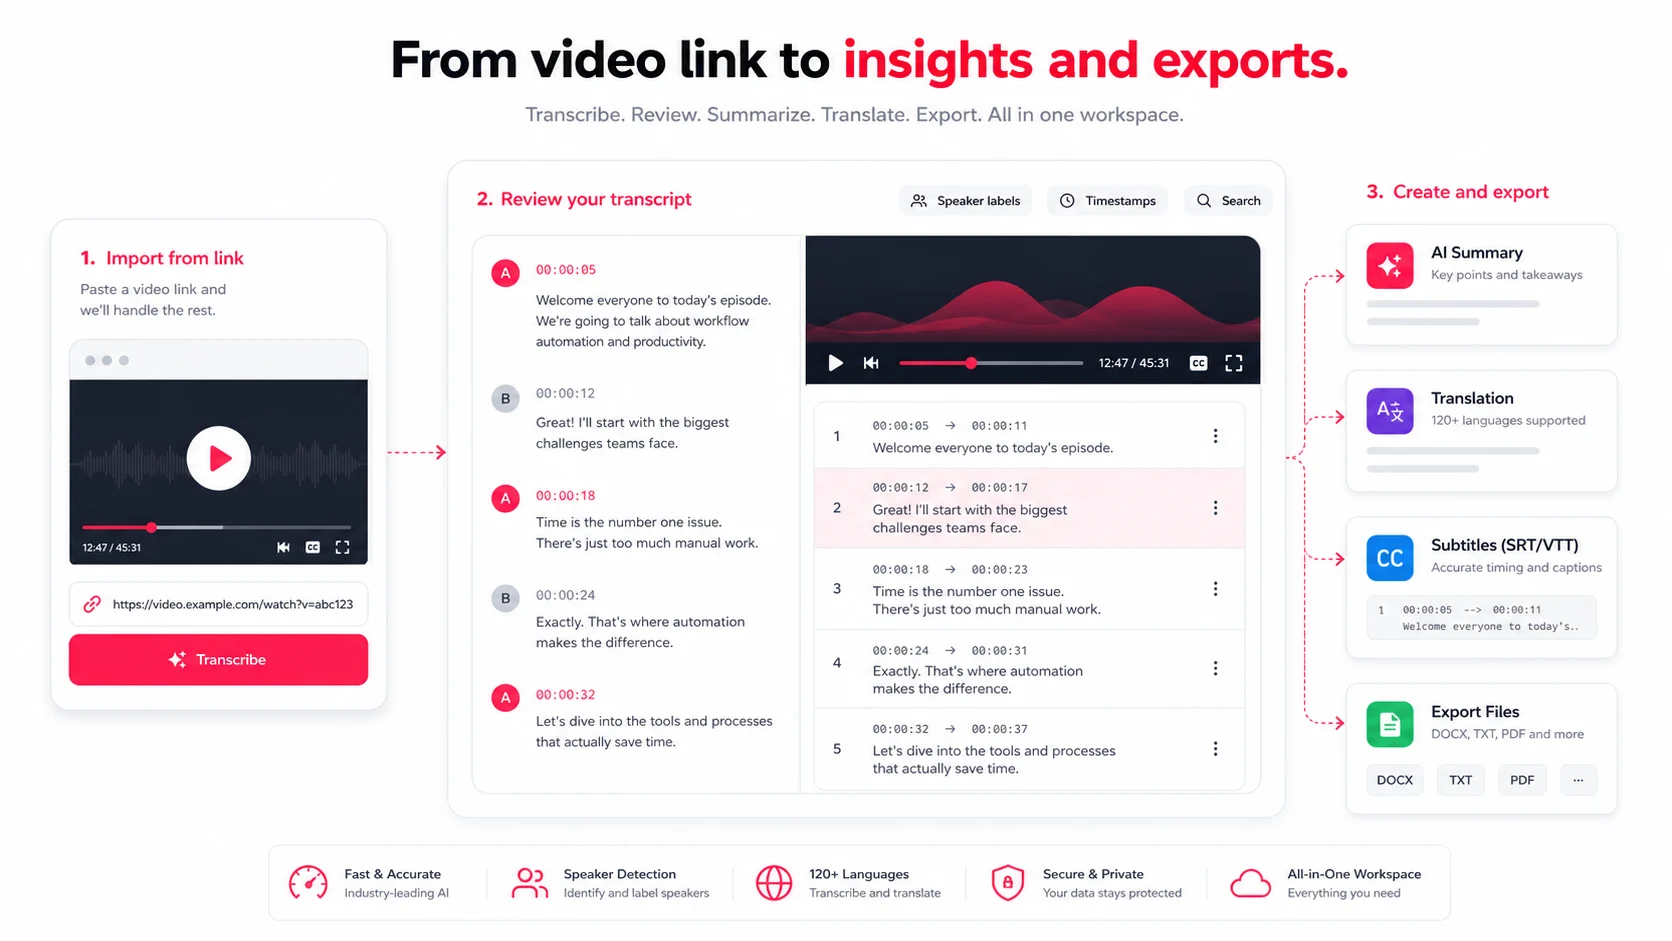
Import the Video From YouTube
Open link transcription, paste the public YouTube URL, and choose the source language when known. EasyScribe prioritizes available platform captions, then uses media transcription when captions are not usable.
Platform captions can be fast and accurate for the published text, but they normally do not include speaker diarization.
Clean the First Draft Before You Switch Devices
Review the first minutes and correct:
- Video title and source language
- Names, organizations, dates, and numbers
- Repeated caption fragments
- Missing punctuation or poor line breaks
- Speaker labels when attribution matters
Cleaning the foundation first prevents the same error from appearing in notes, translations, and subtitles later.
Step 2: Review the Transcript on Tablet and Organize It for Reuse
Skim, Highlight, and Check Timing on a Larger Touch Screen
Use the responsive transcript workspace to scan longer passages and tap timestamps for playback. Check where a quote begins and ends, then split or edit segments that are difficult to reuse.
Tag Sections for Blogs, Clips, and Study Notes
Use Notes to record:
- Strong quotes
- Chapter ideas
- Definitions and examples
- Clip timestamps
- Questions for further research
- Sections that need fact-checking
Keep these notes beside the transcript rather than copying the entire source into a new document too early.
Step 3: Edit Quotes on Phone, Then Create Subtitles, Translations, and Exports
Use Your Phone for Fast Quote and Caption Edits
Mobile review is useful for short corrections: punctuation, names, quote boundaries, and subtitle line length. For large structural edits, return to desktop.
Generate Subtitles and Translate Selected Lines
Create a translation only after the source transcript has been reviewed. Check proper names and terminology in the target language, then preview subtitle timing with the media.
Export the Right File for Each Use Case
| Output | Best use |
|---|---|
| TXT | Plain notes and source text |
| Markdown | Articles and structured documentation |
| SRT | YouTube captions and video editors |
| VTT | Web video captions |
| Share link | Read-only transcript review |
Conclusion: Build a Simple, Repeatable Workflow Across Desktop, Tablet, and Phone
You do not need three devices. The useful principle is to keep one transcript as the source of truth while using the screen that best fits each task: desktop for creation, tablet for review, and phone for quick finishing work.
FAQs
Do I need all three devices?
No. The workflow is a way to divide tasks by screen size. You can complete the entire process on one device.
When should I use SRT instead of VTT?
Use SRT for broad compatibility with video platforms and editors. Use VTT for web players and workflows that need WebVTT features.
Should I translate the full transcript or only key lines?
Translate the full transcript for complete captions or documentation. Translate selected sections when you only need quotes, clips, or a localized summary.