Deep guide
How to get better results with this workflow
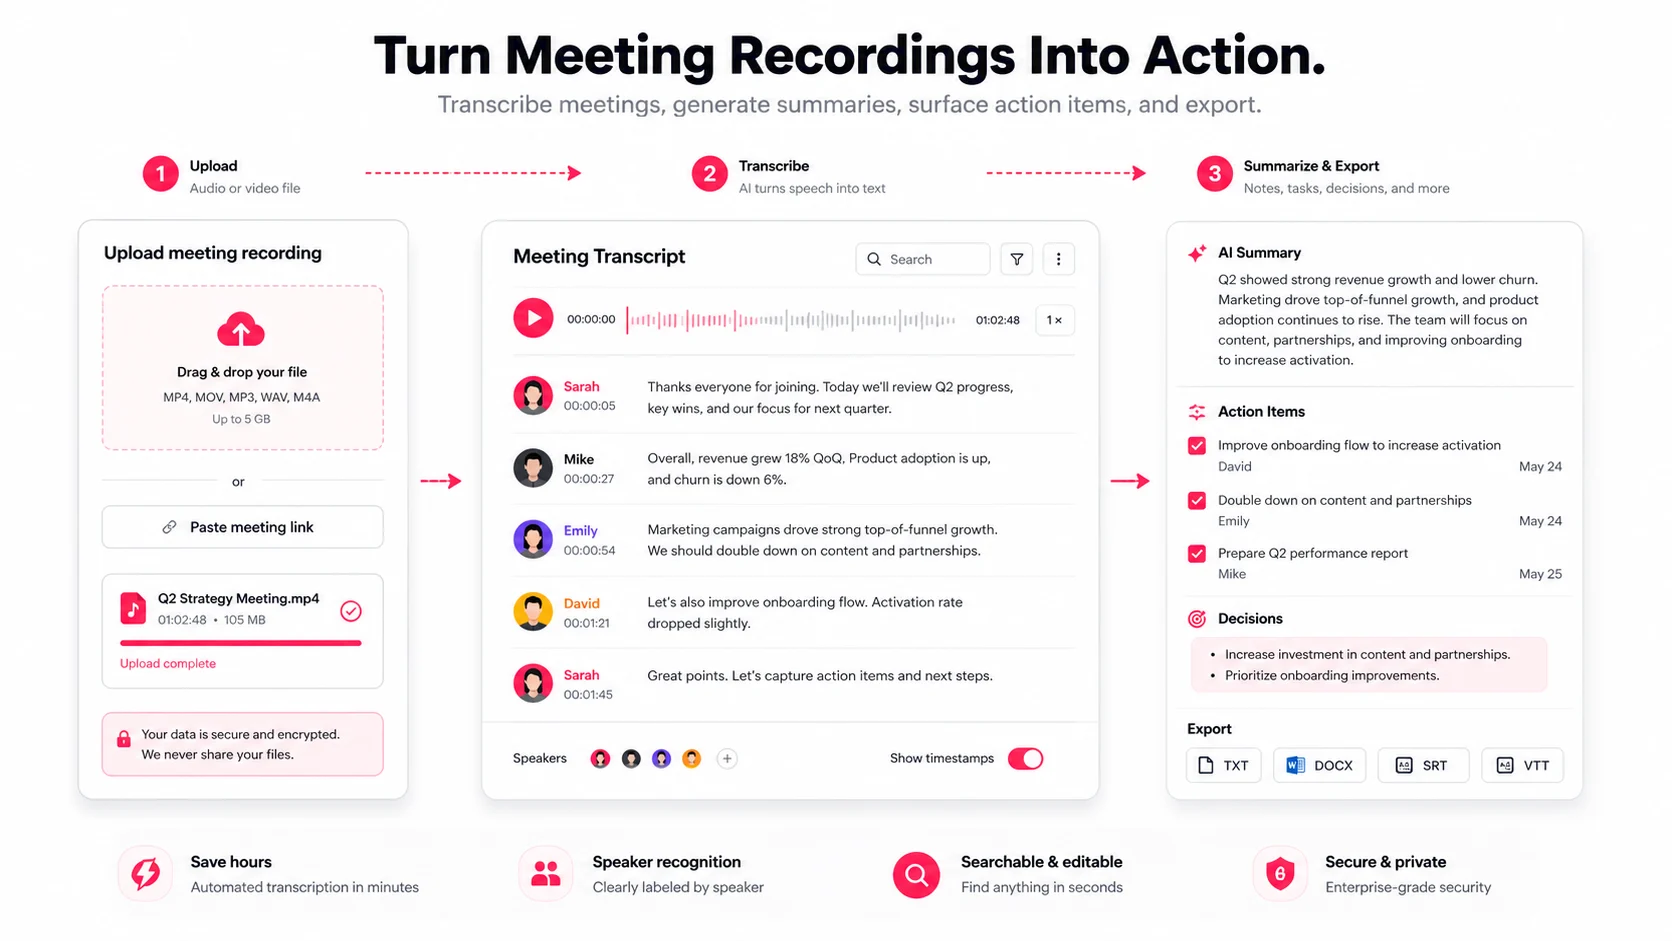
Meeting recordings pile up quickly, and manual transcription can take hours. EasyScribe turns an audio or video recording into timestamped text that can be reviewed, summarized, and exported.
The workflow has five parts:
- Prepare the recording
- Upload the file or supported link
- Review the transcript and speaker labels
- Generate notes and action items
- Export or share the final result
1. Prepare Your Recording Before Uploading
Check your file format and audio quality
EasyScribe accepts common audio and video formats including MP3, WAV, M4A, MP4, MOV, and WebM.
Better audio reduces cleanup. Record near the main speakers, reduce echo, mute notifications, and avoid people speaking at the same time. Do not convert a good source file into a lower-quality format unless necessary.
Get consent and follow your organization's recording policies
Tell participants when a meeting is being recorded and follow the laws and internal policies that apply to your team. Sensitive HR, legal, health, or customer conversations may require stricter access and retention controls.
2. Upload Your Meeting to EasyScribe and Generate a Transcript
Upload a file or URL and start transcription
Open file transcription to upload the recording, or use link transcription for a supported public URL. Select the source language when you know it; otherwise use automatic detection.
Upload progress is shown before the task enters the transcription queue. Long-running work continues in the background, so leaving the page does not cancel it.
Upload Zoom and video recordings the same way
Export the Zoom, Teams, or conference recording, then upload the audio or video file. Keeping the original video gives you a useful reference when checking speaker turns and visual context.
Use batch uploads for recurring meetings
For a backlog, select multiple files and create the tasks together. Review the task list by status instead of waiting on each page. Failed uploads can be retried, and active tasks can be stopped and deleted.
3. Identify Speakers and Clean Up the Transcript
Label speakers and use timestamps to navigate
Uploaded multi-speaker audio can request speaker detection on supported plans. Rename generic labels after you recognize the participants. Click timestamps to compare text with the recording.
Platform captions may not contain speaker identity. In that case, create or rename speakers manually.
Correct names, terms, dates, and common errors
Focus review on information that changes meaning:
- Participant and company names
- Dates, amounts, percentages, and identifiers
- Product names and technical vocabulary
- Decisions, commitments, and deadlines
- Negations and uncertain audio
Raw draft vs. cleaned transcript: what changes
| Raw draft | Cleaned transcript |
|---|---|
| Generic speaker labels | Real names or consistent roles |
| Misheard names | Correct people and organizations |
| Long spoken blocks | Readable transcript segments |
| Unchecked figures | Verified dates, amounts, and deadlines |
| Filler and repetition | Clearer text for notes and export |
4. Turn the Transcript Into Notes, Summaries, and Action Items
Generate meeting notes and short summaries
Use the Chat or summary workflow to create a concise overview, decisions, open questions, and important context. Treat the output as a structured draft and verify it against the transcript.
Pull out tasks, owners, and deadlines
Ask for action items in a simple structure: task, owner, deadline, and source timestamp. If the conversation did not name an owner or deadline, keep that field unassigned rather than guessing.
Export, share, and add subtitles or translations
After review, export TXT, Markdown, SRT, or VTT. Enable a public share link only when the transcript is safe to share. Add translations from the reviewed source so names and terminology stay consistent.
Conclusion
The fastest reliable meeting workflow is not transcription alone. It is upload, complete transcript generation, targeted review, summary, and export in one workspace.
FAQs
How long does meeting transcription usually take?
Processing time depends on file duration, queue load, and audio complexity. The task continues in the background, so you can leave the detail page while it runs.
What if the recording has background noise or overlapping speakers?
The transcript may require more review. Use the source media and timestamps to verify uncertain passages and correct speaker labels manually.
Can one transcript become meeting notes, action items, and subtitles?
Yes. A reviewed transcript can support summaries, action-item prompts, plain-text exports, and SRT or VTT subtitle files.
Can EasyScribe transcribe Zoom or Teams recordings?
Yes, when you upload the exported audio or video file in a supported format.
Does EasyScribe support languages other than English?
Yes. Choose a source language or use automatic detection, then create translations from the reviewed transcript.